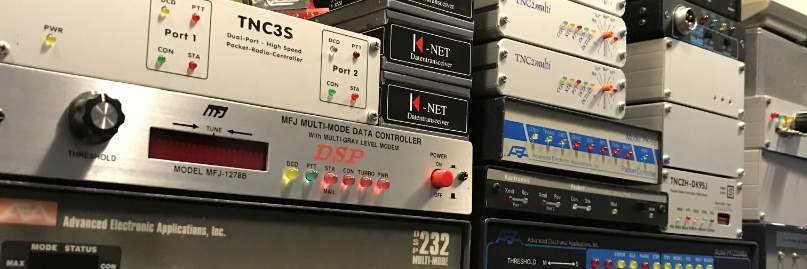

Category: Direwolf
Direwolf 1.6 D (Mar 1 2020) FX.25

I did some testing with a friend of mine PD2NLX. We have tested the (new) FX.25 protocol (32 and 16 Bytes) This is AX25 with forward error correction. Now the distance between us is quite short, about 5 kilometers. We have discovered that the 16 bytes check at a short distance works better.
First I have installed the “dev” release of Direwolf.
git clone https://github.com/wb2osz/direwolf.git
cd direwolf
git branch -r
git checkout dev
mkdir build && cd build
cmake ..
make -j4
sudo make install
make install-conf
My direwolf.start file look like this
#Start direwolf with -X (16, 32, 64) option to enable FX.25 tx. Number (16, 32, 64) means bytes to check
direwolf -X 16 -d x -t 0 -c /home/pd9q/jnos/direwolf.conf -l /home/pd9q/jnos/logs/direwolf >/dev/tty3

I have add the start option “-d x” Let’s take a look at what that looks like.
FX.25: Matched correlation tag 0x05 with 6 bit errors.  Expecting 223 data & 32 check bytes.
FX.25: Matched correlation tag 0x05 with 0 bit errors.  Expecting 223 data & 32 check bytes.
FX.25: Matched correlation tag 0x05 with 0 bit errors.  Expecting 223 data & 32 check bytes.
FX.25: FEC complete with no errors.
FX.25: FEC complete with no errors.
FX.25: FEC complete, fixed 13 errors in byte positions: 11 19 65 73 74 92 116 117
132 138 143 144 192

FX.25: Matched correlation tag 0x06 with 1 bit errors.  Expecting 128 data & 32 check bytes.
FX.25: Matched correlation tag 0x06 with 1 bit errors.  Expecting 128 data & 32 check bytes.
FX.25: Matched correlation tag 0x06 with 1 bit errors.  Expecting 128 data & 32 check bytes.
FX.25: Matched correlation tag 0x06 with 1 bit errors.  Expecting 128 data & 32 check bytes.
FX.25: FEC complete with no errors.
FX.25: FEC complete with no errors.
FX.25: FEC complete with no errors.
FX.25: FEC complete, fixed  1 errors in byte positions: 97

FX.25: Matched correlation tag 0x04 with 0 bit errors.  Expecting 32 data & 16 check bytes.
FX.25: Matched correlation tag 0x04 with 0 bit errors.  Expecting 32 data & 16 check bytes.
FX.25: Matched correlation tag 0x04 with 0 bit errors.  Expecting 32 data & 16 check bytes.
FX.25: Matched correlation tag 0x04 with 0 bit errors.  Expecting 32 data & 16 check bytes.
FX.25: FEC complete, fixed  1 errors in byte positions: 248
FX.25: FEC complete with no errors.
FX.25: FEC complete with no errors.
FX.25: FEC complete with no errors.

FX.25: Matched correlation tag 0x01 with 0 bit errors.  Expecting 239 data & 16 check bytes.
FX.25: Matched correlation tag 0x01 with 0 bit errors.  Expecting 239 data & 16 check bytes.
FX.25: Matched correlation tag 0x01 with 0 bit errors.  Expecting 239 data & 16 check bytes.
FX.25: Matched correlation tag 0x01 with 0 bit errors.  Expecting 239 data & 16 check bytes.
FX.25: FEC complete with no errors.
FX.25: FEC complete with no errors.
FX.25: FEC complete with no errors.
FX.25: FEC complete with no errors.
It has, of course, been developed to work over large distances and thus achieve a reasonably reliable connection. But it works surprisingly well.
Direwolf AX.25 + FEC = FX.25
Probably most of you will already know, Direwolf will support FX.25. This is AX25 with forward error correction. Nice.
The mail John, WB2OSZ posted on the mail list.
What can you do if your radio signal isn’t quite strong enough to get through reliably?
Move to higher ground?  Get a better antenna?  More power?
Send data very very slowly with narrow bandwidth?

Sometimes those are not options.
Another way to improve communication reliability is to add redundant information
so the message will still get through even if small parts are missing.

FX.25 has been used for more than a decade with some satellites.
Receiving implementations were oriented toward that niche application.
Now that FX.25 is easy to use, integrated into a general purpose TNC,
many other AX.25 based applications can gain the benefits while retaining
complete compatibility with older equipment.

Direwolf Kissutil
I was reading on a website and there they talked about kissutil from Direwolf. This appears to be a tool you use interactively for troubleshooting a kiss tnc or you can use it as an application interface. Very nice tool.
kissutil  can be used interactively for troubleshooting a KISS TNC.
It is usable with direwolf and other generic KISS TNCs connected to a serial port.
It can also be used as an application interface where each side places files in a directory for the other to process.

Options
-h host
Hostname or IP address for a TCP KISS TNC.  Default is localhost.

-p port
A number may be specified for a TCP port other than the default 8001.
If not a number, it is considered to be a serial port name such as /dev/ttyS0 or COM3.

-s speed
Speed for serial port. e.g. 9600.

-o rec-directory
For each received frame, a new file is created here.
It is expected that some other application will process files in this directory then delete them.

-T format
Each received frame will be preceded by a timestamp in the specified format.
See strftime documentation for a description of the format string. Example:  %H:%M:%S  for current time in hours, minutes, seconds.

-f xmit-directory
Files in this directory are transmited and deleted. Another application places a file here when it wants something to be transmitted.

-v
Verbose - Display the KISS frames going to and from the TNC.
In the User-guide-1.6-pre you can find somemore info on section 14.6
Bind ax25 interface to Direwolf
It can be easy to link an ax25 interface to Direwolf. This makes it possible to use RMSGateway, Uronode etc with Direwolf.
In this script Direwolf is started with the -p option. With the -p option a virtual tnc is created. /tmp/kisstnc.
With mkiss a kiss connection is made on the /tmp/kisstnc. With kissattach the PTY is connected to the ax25 interface.
Fist edit the file axports in /etc/ax25
pd9q@pd9q:/etc/ax25 $ cat axports
# /etc/ax25/axports
# name callsign speed paclen window description
#
ax0     PI1LAP-9       19200    255     7     RMSGateway pi1lap-10
Config the direwolf.conf file to set the right audio device and ptt port. Save file to /etc/ax25/direwolf.conf
ADEVICE plughw:1,0
ACHANNELS 1
CHANNEL 0
MODEM 300 2130:2230 D
PTT GPIO 21
DWAIT 0
SLOTTIME 12
PERSIST 63
TXDELAY 40
TXTAIL 10
FIX_BITS 1 AX25
LOGDIR /var/log/direwolf
Run the script
#!/bin/bash
   PATH=/usr/local/sbin:/usr/local/bin:/bin:/usr/bin:/etc/ax25:/usr/local/ax25
   echo "Starting direwolf"
     direwolf -t 0 -c /etc/ax25/direwolf.conf -p &
   #Check if Direwolf is running
   sleep 5
   if [ -z "`ps ax | grep -v grep | grep direwolf`" ]; then
      echo -e "\nERROR: Direwolf did not start properly and is not running, please review direwolf.conf"
         exit 1
   fi
   echo "Installing one KISS connection on PTY port /tmp/kisstnc"
     mkiss -s 19200 -x 1 /tmp/kisstnc > /tmp/unix98
   #This creates a PTS interface like "/dev/pts/3"
     export PTS0=`more /tmp/unix98 | grep -w /dev | cut -b -11`
     echo "PTS0 device: $PTS0"
     kissattach $PTS0 ax0  > /tmp/ax25-config.tmp
     awk '/device/ { print $7 }' /tmp/ax25-config.tmp > /tmp/ax25-config1-tmp
     read Device < /tmp/ax25-config1-tmp
Let’s check if everything went well.
pd9q@pd9q:~ $ ps ax
1015 ?        Ss     0:00 mkiss -s 19200 -x 1 /tmp/kisstnc
1025 ?        Ss     0:00 kissattach /dev/pts/2 ax0
Try it out…
pd9q@pd9q:~ $ call ax0 pd9q-2
GW4PTS AX.25 Connect 2.0.0
Trying...
*** Connected to pd9q-2
*** Cleared
Now it’s possible to setup RMSGateway or Uronode of whatever you want.
Installing Direwolf and LinBPQ on Raspian Stretch
Jeff KP3FT has written a nice document about the installation of Direwolf and Linbpq on a Raspberry with raspbian Stretch. Download the complet document here.
 Dire Wolf
Installing Direwolf and linBPQ on a new Raspian Stretch installation. It’s a combination from various websites and documentation, condensed down into a straightforward walkthrough. This doesn’t include configuration of most BPQ settings, only enough to get it to use Direwolf as a modem.
Older Raspian versions like Jessie may require Pulse Audio removed first, prior to installing Direwolf. Raspian Stretch by default does not have Pulse Audio installed. My Raspian config settings have SSH and VNC enabled.
First:
sudo apt-get update
sudo apt-get upgrade
sudo reboot now
After it restarts, install libasound:
sudo apt-get install libasound2-dev
Optionally install the following if you want to enable Direwolf to use the GPIO pin on certain USB sound devices for PTT:
sudo apt-get install libudev-dev
Then install Direwolf (as of this writing, version 1.5 is the latest):
cd ~
git clone https://www.github.com/wb2osz/direwolf
cd ~/direwolf
git tag
git checkout 1.5
make -j
sudo make install
make install-rpi
make install-conf
Plug your USB sound device(s) into the RPi, open a terminal, and run the following to verify the system sees the USB sound device(s).
aplay -l (the smallcase letter "l", not the number "1")
If the Raspberry pi’s onboard audio is enabled, it will show up as Card 0, Device 0. The USB sound device should show up as Card 1, Device 0. A second USB sound device will show up as Card 2, Device 0, and so on.
Open the direwolf.conf file in a text-editor, scroll down, and enable the correct USB sound device by removing the # at the beginning of the appropriate line. For example, on mine it is:
ADEVICE plughw:1,0
Scroll down and change “N0CALL” to your callsign in the line:
MYCALL N0CALL
Enable the modem speed you want. In my case, I enable 300-baud:
MODEM 300
Scroll down and enable the appropriate PTT option for your setup.
Further down, enable and change the AGWPORT and KISSPORT settings for your setup.
Optionally disable all the APRS-related lines if you don’t want to use those functions.
Save the file and run Direwolf by double-clicking the desktop icon, or test-run it from Terminal with:
cd ~
direwolf
You should see packet activity if the radio is tuned on the right frequency and audio level is good.
Close Direwolf for now (CTRL-C) and install pilinBPQ (skip down to the Direwolf port section if pilinBPQ is already installed):
sudo mkdir linbpq
cd linbpq
sudo wget http://www.cantab.net/users/john.wiseman/Downloads/Beta/pilinbpq
sudo mv pilinbpq linbpq
sudo chmod +x linbpq
sudo su
setcap "CAP_NET_ADMIN=ep CAP_NET_RAW=ep CAP_NET_BIND_SERVICE=ep" linbpq
su pi
sudo mkdir HTML
cd HTML
sudo wget http://www.cantab.net/users/john.wiseman/Downloads/Beta/HTMLPages.zip
sudo unzip HTMLPages.zip
cd ~/linbpq
sudo mkdir BPQAPRS
cd BPQAPRS
sudo wget http://www.cantab.net/users/john.wiseman/Documents/Samples/APRSHTML.zip
sudo unzip APRSHTML.zip
cd ~
sudo chown -R pi:pi linbpq
Copy an existing Linux bpq32.cfg from another source to /pi/linbpq. I have an old bpq32.cfg file here which would need some substantial editing for your own setup:
https://www.qsl.net/swlkp3/Packet/bpq32(Linux).cfg .
Be sure to rename it to bpq32.cfg .If you don’t use the above bpq32.cfg file, and add one or both of these Direwolf ports in the ports section of whatever copy of bpq32.cfg you have, depending on how many Direwolf modems you want to run. Change the port numbers to whatever works with your particular setup. The timing settings can also be changed; these are what worked with my setup for 300-baud HF packet and 1200-baud VHF packet.
;******PORT 1 Direwolf 300-baud*****
PORT
   PORTNUM=1                 ; Port number
   ID=HF Packet 300-baud     ; PORTS command text
   TYPE=ASYNC                ; RS232 connection
   IPADDR=127.0.0.1          ; DIREWOLF
   TCPPORT=8001              ; DIREWOLF
   SPEED=19200
   CHANNEL=A                 ; TNC channel
   MAXFRAME=1                ; Max outstanding frames
   FRACK=5000                ; Level 2 timeout (ms)
   RESPTIME=40               ; Level 2 delayed ACK (ms)
   RETRIES=10                ; Level 2 max retries
   PACLEN=40                 ; Max packet length (bytes)
   TXDELAY=100               ; Transmit keyup delay (ms)
   SLOTTIME=100            ; CMSA interval timer (ms)
   TXTAIL=30
   PERSIST=63     ; Persistence (256/(# transmissions-1)
   DIGIFLAG=1       ; Allow Digipeat on this port
ENDPORT
;****** PORT 2 Direwolf 1200-baud *****
PORT
   PORTNUM=2                 ; Port number
   ID=VHF Packet 1200-baud   ; PORTS command text
   TYPE=ASYNC                ; RS232 connection
   IPADDR=127.0.0.1          ; DIREWOLF
   TCPPORT=8003              ; DIREWOLF
   SPEED=19200
   CHANNEL=A                 ; TNC channel
   MAXFRAME=1                ; Max outstanding frames
   FRACK=5000                ; Level 2 timeout (ms)
   RESPTIME=40               ; Level 2 delayed ACK (ms)
   RETRIES=10                ; Level 2 max retries
   PACLEN=236                 ; Max packet length (bytes)
   TXDELAY=100               ; Transmit keyup delay (ms)
   SLOTTIME=100            ; CMSA interval timer (ms)
   TXTAIL=30
   PERSIST=63     ; Persistence (256/(# transmissions-1)
   DIGIFLAG=1       ; Allow Digipeat on this port
ENDPORT
Save the file.
Start Direwolf.
Open another Terminal and start linBPQ:
cd ~/linbpq
sudo -u pi ./linbpq
It should connect to Direwolf(s) on port 127.0.0.1:8001 or whatever port(s) you set up.
Notes:
——
Multiple instances of Direwolf can run at the same time. Each instance has its own “.conf” file. Each conf file needs to be edited to enable whatever port and USB sound device will be used. To do that, just edit the original “direwolf.conf” file and save it under a new name, such as “direwolf_HF.conf”, etc. Start each instance in Terminal using the “-c” switch to point Direwolf to the correct “.conf” file. In my setup, I start the first Direwolf instance in Terminal with “direwolf -c direwolf.conf”. The second instance is started in another Terminal with “direwolf -c direwolf_HF.conf”.
Direwolf has several options that can be used in the command line. Three that I find particularly useful are the “-q”, -T”, and “-x” options. By default, Direwolf shows audio in/out levels in its Terminal screen. This can be turned off with “-q h”. For example, when I run my HF 300-baud instance of Direwolf to disable audio reports, I run “direwolf -c direwolf_HF.conf -q h”
To show timestamps of sent and received packet frames, use the “-T” option with “%H:%M:%S”. Example: “direwolf -c direwolf_HF.conf -q h -T %H:%M:%S” to disable audio reporting and show timestamds in hours-minutes-seconds format.
The “-x” option immediately starts Direwolf transmitting calibration tones, which I use mostly to key the transciever for tuning the antenna when I switch bands. Example: “direwolf -c direwolf_HF.conf -q h -T %H:%M:%S -x”. Enter CNTRL-C to stop the transmit.
The complete list of command-line options are in the Direwolf user guide, pages 126 through 128: https://github.com/wb2osz/direwolf/tree/master/doc
DireWolf/Linpq with Systemd.
I have a bad time behind me, I have had a lot of arguments with Systemd to start DireWolf and Linpq when booting 🙂
If you like Systemd, you can read some about it here https://en.wikipedia.org/wiki/Systemd
I want Linbpq to run under /dev/tty2 and DireWolf under /dev/tty3. This is because if I login remotely I can view the monitor from DireWolf with “conspy”. “conspy 3” Hit esc a few times to leave conspy.
Systemd does not want to accept the start line with >/dev/tty3 &
ExecStart=/usr/local/bin/direwolf -c /home/pd9q/direwolf.conf -l /home/pd9q/direwolf.log >/dev/tty3
This upper start line does not work.
So I had to come up with something else for that. So i wrote a start file. “direwolf.start”
cd /usr/local/bin
./direwolf -c /home/pd9q/direwolf.conf -l /home/pd9q/direwolf.log >/dev/tty3
Now i wrote a unit file to start DireWolf on boot.
/etc/systemd/system/direwolf.service
[Unit]
Description=DireWolf Deamon
After=network.target
After=sound.target
After=syslog.target

[Service]
Type=simple
ExecStart=/bin/bash /home/pd9q/linbpq/direwolf.start

[Install]
WantedBy=multi-user.target
Alias=direwolf.service
Now DireWolf is starting very nice on /dev/tty3
pd9q@packet:~ $ systemctl status direwolf.service
● direwolf.service - DireWolf Deamon
   Loaded: loaded (/lib/systemd/system/direwolf.service; enabled; vendor preset: enabled)
   Active: active (running) since Wed 2018-09-12 10:58:51 UTC; 1h 18min ago
 Main PID: 463 (bash)
   CGroup: /system.slice/direwolf.service
           ├─463 /bin/bash /home/pd9q/linbpq/direwolf.start
           └─474 ./direwolf -c /home/pd9q/direwolf.conf -l /home/pd9q/direwolf.log

Sep 12 10:58:51 packet systemd[1]: Started DireWolf Deamon.
pd9q@packet:~ $
I had the same problem with Linbpq, which I solved in the same way.
Linbpq start file “runbpq”
cd /home/pd9q/linbpq
sudo ./linbpq  >/dev/tty2
The unit file “linbpq.service”
[Unit]
Description=Linbpq Daemon
After=network.target
After=direwolf.target
StartLimitInterval=0

[Service]
Type=simple
Restart=always
RestartSec=5
ExecStart=/bin/bash /home/pd9q/linbpq/runbpq
WorkingDirectory=/home/pd9q/linbpq

[Install]
WantedBy=multi-user.target
Alias=linbpq.service
Ok, let’s see if it is running
pd9q@packet:~ $ systemctl status linbpq.service
● linbpq.service - Linbpq Daemon
   Loaded: loaded (/lib/systemd/system/linbpq.service; enabled; vendor preset: enabled)
   Active: active (running) since Wed 2018-09-12 10:58:51 UTC; 1h 23min ago
 Main PID: 464 (bash)
   CGroup: /system.slice/linbpq.service
           ├─464 /bin/bash /home/pd9q/linbpq/runbpq
           ├─473 sudo ./linbpq
           └─501 ./linbpq

Sep 12 12:13:36 packet LINBPQ[501]: BPQ32 Heartbeat Buffers 102
Sep 12 12:14:31 packet LINBPQ[501]: BPQ32 Heartbeat Buffers 99
Sep 12 12:15:27 packet LINBPQ[501]: BPQ32 Heartbeat Buffers 102
Sep 12 12:16:22 packet LINBPQ[501]: BPQ32 Heartbeat Buffers 102
Sep 12 12:17:17 packet LINBPQ[501]: BPQ32 Heartbeat Buffers 102
Sep 12 12:18:12 packet LINBPQ[501]: BPQ32 Heartbeat Buffers 100
Sep 12 12:19:07 packet LINBPQ[501]: BPQ32 Heartbeat Buffers 102
Sep 12 12:20:03 packet LINBPQ[501]: BPQ32 Heartbeat Buffers 102
Sep 12 12:20:58 packet LINBPQ[501]: BPQ32 Heartbeat Buffers 102
Sep 12 12:21:53 packet LINBPQ[501]: BPQ32 Heartbeat Buffers 102
pd9q@packet:~ $
Now have a look at /dev/tty2 “conspy 2”
G8BPQ AX25 Packet Switch System Version 6.0.16.30 July 2018
Copyright ▒ 2001-2018 John Wiseman G8BPQ
Current Directory is /home/pd9q/linbpq

Configuration file Preprocessor.
Using Configuration file /home/pd9q/linbpq/bpq32.cfg
Conversion (probably) successful

PORTS 1d9784 LINKS 1dce14 DESTS 1dfc58 ROUTES 1f9c58 L4 1fd058 BUFFERS 22f170

Initialising Port 01     TCPKISS IP 127.0.0.1 Port 8001 Chan A
Initialising Port 02     AXIP
Initialising Port 03     Telnet Server
Initialising Port 04     Loopback
Direwolf to LinBPQ config
John WQ6N has found a solution for direwolf and Linbpq that works very well for HF.
Direwolf.conf
/etc/direwolf/direwolf.conf
ADEVICE plughw:1,0
ACHANNELS 1
CHANNEL 0
MODEM 300 2130:2230 D
SERIALKISS /dev/ptyp0 19200
KISSPORT 0
DWAIT 0
SLOTTIME 12
PERSIST 63
TXDELAY 40
TXTAIL 10
FIX_BITS 1 AX25
LOGDIR /var/log/direwolf
bpq32.cfg
/linbpq/bpq32.cfg (HFGW Port)
PORT
PORTNUM=XX                       ; Optional but sets port number if stated
ID=BPQ HFGW                     ; Displayed by PORTS command
TYPE=ASYNC                       ; Port is RS232 Com
PROTOCOL=KISS           ; TNC is used in KISS, JKISS or BPQKISS mode
FULLDUP=0                        ; Only meaningful for KISS, JKISS or BPQKISS devices
COMPORT=/dev/ttyp0
SPEED=19200                      ; RS232 COM PORT SPEED
CHANNEL=A                        ; A for single channel TNC, A or B for multichannel
NOKEEPALIVES=1
PERSIST=63                       ; PERSIST=256/(# of transmitters-1)
SLOTTIME=120            ; CMSA interval timer in milliseconds
TXDELAY=300             ; Transmit keyup delay in milliseconds
TXTAIL=100                       ; TX key down, in milliseconds, at packet end
QUALITY=0               ; Quality factor applied to node broadcasts heard on
MINQUAL=0               ; Entries in the nodes table with qualities greater or
MAXFRAME=1                       ; Max outstanding frames (1 thru 7)
FRACK=5000                       ; Level 2 timout in milliseconds
RESPTIME=1000           ; Level 2 delayed ack timer in milliseconds
RETRIES=15                       ; Level 2 maximum retry value
PACLEN=60                        ; Default max packet length for this port
UNPROTO=<URNODE>             ; BTEXT broadcast addrs format: DEST[,digi1[,digi2]]
BCALL=<URCALL-SSID>            ; BTEXT call. unstated defaults to APPL1CALL
L3ONLY=0                         ; 1=No user downlink connects on this port
DIGIFLAG=0                       ; Digipeat: 0=OFF, 1=ALL, 255=UI Only
DIGIPORT=0                       ; Port on which to send digi'd frames (0 = same port)
USERS=0                 ; Maximum number of L2 sessions, 0 = no limit
ENDPORT
journalctl -o cat -af -u direwolf
Opened /dev/ptyp0 for serial port KISS.
KISS protocol set TXDELAY = 30 (*10mS units = 300 mS), port 0
KISS protocol set Persistence = 63, port 0
KISS protocol set SlotTime = 12 (*10mS units = 120 mS), port 0
KISS protocol set TXtail = 10 (*10mS units = 100 mS), port 0
KISS protocol set FullDuplex = 0, port 0
Direwolf and Jnos (review)
In the previous post about Direwolf and jnos i use Direwolf-1.3 and does not know about the SERIALKISS port.
John WQ6N point it out to me… Tnx John WQ6N. Nice one.
Read the previous post.
So maybe I wrote that script for nothing. This is working pretty simple 🙂
In Direwolf 1.5-beta is it possible to use SERIALKISS to connect com to com.
I have try to use a PTY pair created with socat.
# Create pty pair
socat -d -d -ly PTY,link=/dev/ttyq1 PTY,link=/dev/ptyq1 &
sleep 2
# Start Direwolf
direwolf -d kn -c /direwolf/direwolf.conf &> /var/log/direwolf.log >/dev/tty3 &
sleep 2

Direwolf.conf
SERIALKISS  /dev/ttyq1 19200

# Jnos autoexec.nos
attach asy ptyq1 - ax25 ax0 4096 256 19200

Fireup Jnos
./jnos -C -g2 -u3 -f nos.cfg -i
I use conspy to look at the output of Direwolf. apt-get install conspy
Use it just like this “conspy 3” The number 3 stands for the tty were Direwolf is running on /dev/tty3.
Hit the escape button a couple of times to exit.
Here is the output of Direwolf
>>> Data frame to KISS client application, port 0, total length = 82
  000:  c0 00 92 88 40 40 40 40 e0 9c 98 70 b4 b4 8a 60  ....@@@@...p...`
  010:  ae 92 88 8a 62 40 63 03 f0 43 6f 6e 6e 65 63 74  ....b@c..Connect
  020:  20 4e 4c 36 5a 5a 45 20 66 6f 72 20 74 68 65 20   PD2LT-6 for the
  030:  4a 4e 4f 53 20 43 6f 6e 76 65 72 73 20 28 6c 69  JNOS Convers (li
  040:  6e 6b 65 64 20 77 69 74 68 20 6f 74 68 65 72 73  nked with others
  050:  29 c0
Ok that is working quit well.
I start Direwolf with the option “-d kn” So you can look at the kiss communication between Direwolf and Jnos.
Some text out of the User-Guide.pdf.
“Up to 3 concurrent TCP KISS client applications are allowed at the same time.
You can raise this limit by increasing the value of MAX_NET_CLIENTS, in source file kissnet.c and recompiling.”
Whoooo thats nice up to 3 (and more) applications can connect to Direwolf on the KISSPORT.
And there is also the AGW and the SERIALKISS port. Men where do I start.
John WQ6N
John WQ6N has found something that is useful. He use a Legacy BSD pseudo pair.
There are no Legacy BSD pseudo pairs in Linux any more. But it is possible to create some.
/etc/default/grub:
Change line from:
GRUB_CMDLINE_LINUX=""
to:
GRUB_CMDLINE_LINUX="pty.legacy_count=10"
(Where 10 is the number of pty legacy devices you require.)
This created 10 ptypX/ttypX terminal pairs.
After editing the grub file run the command “update-grub” and reboot.
So now it`s time to set Direwolf and Jnos to use the pty Legacy devices.
The Direwolf SERIALKISS
SERIALKISS /dev/ptyp0 19200

The associated JNOS2 attach line:
attach asy ttyp0 - ax25 hfgw 4096 256 19200
Direwolf and Jnos
#!/bin/bash
# 6 march 2018
# Wrote a small script to get the shittie PTS to a file where its belongs.
# Yes you can also use the agw driver from Direwolf for Jnos.
# Now its also possible to "sed" the right PTS to your ax25 start file
#
# socat -d -d -lf /tmp/socat.pts PTY,link=/tmp/kisstnc TCP4:127.0.0.1:8001 &
# sleep 2
# grep -o "/dev/pts/." /tmp/socat.pts > /tmp/devs.pts
# attachthem () {
# read PTS1
# sed -i "s,kissattach -m 256 /dev/.*$,kissattach -m 256 $PTS1 ax0 44.137.31.73," /etc/ax25/ax-start
#
# }
#
# tail -n 1 /tmp/devs.pts | attachthem
# rm /tmp/socat.pts
# rm /tmp/devs.pts
# sleep 3
#
# Or use it with (X)net.
# sed -i "s,attach sdev4 kiss 4 1 19200 /dev/.*$,attach sdev4 kiss 4 1 19200 $PTS1," /usr/local/xnet/AUTOBOOT.NET
#
# Or with BPQ
# sed -i "s,COMPORT=/dev/.*$,COMPORT=$PTS1," /usr/local/linbpq/bpq32.cfg
#
# Oo well maybe work this better
# IPADDR=127.0.0.1
# TCPPORT=8001
#
# Yes there are many way`s to do this, but i had some fun to play with it.
# Maybe it is useful for someone.
#################################################################################################
The scipt…. Small but work quit well
#!/bin/bash
echo "Starting direwolf with socat for jnos/ax25"
# Set the path to direwolf and some stuff
PATH=/direwolf:/usr/bin:/bin:/usr/local/bin
# Start Direwolf
direwolf -c /direwolf/direwolf.conf &> /var/log/direwolf.log >/dev/tty3 &
sleep 3
# Socat kisstnc link with a PTS
socat -d -d -lf /tmp/socat.pts PTY,link=/tmp/kisstnc TCP4:127.0.0.1:8001 &
sleep 2
grep -o "/dev/pts/." /tmp/socat.pts > /home/pd2lt/jnos/spool/ptmx_radio.cfg
echo "Direwolf is connect to" `cat /home/pd2lt/jnos/spool/ptmx_radio.cfg`
echo "Now Jnos is ready to Rock and Roll :)"
rm /tmp/socat.pts
# Dont delete ptmx_radio.cfg before starting Jnos
rm /home/pd2lt/jnos/spool/ptmx_radio.cfg
sleep 1
This is what i found in the change.log of Jnos
Better support for PTY98 (/dev/ptmx, /dev/pts/N) pseudo devices. Bob (VE3TOK)
   asked for this a long time ago, so I figured I better get it implemented.

   Note : Technically one can use the new jnos 'attach baycom' and go direct to
   a kernel KISS type interface, meaning you don't need to run an intermediary
   program (kissattach or net2kiss) anymore. Try it, let me know how it works.

   COMPILE : Make sure '#define JNOSPTY98' exists in your config.h file.

   The best way for me to show how this feature works is by example. One way of
   getting JNOS to use a linux AX25 device is through the 'kissattach' program,
   but get the one from F6BVP (it has a mod that actually outputs the name of
   the slave device after you run the program). The stock ax25 utilities will
   not tell you that (you have to look for a new /dev/pts/N to appear then).

      kissattach /dev/ptmx radio > /jnos/spool/ptmx_radio.cfg

   The issue here is you don't know what slave device you will get, it could
   change each time you run kissattach, there may be no consistent device name
   for you to depend on when running 'attach asy' in the JNOS autoexec.nos.

   Now in JNOS (autoexec.nos), suppose we have this entry below :

      attach asy ptmx_radio - ax25 ax0 4096 256 9600

   I have added a feature where if the 3rd argument starts with 'ptmx_', then
   JNOS will look for a corresponding *.cfg file, and extract the slave device
   name from it, and then attach using that instead of the original argument.
This is some monitor output of Direwolf.
Dire Wolf version 1.3
Reading config file /direwolf/direwolf.conf
Audio device for both receive and transmit: plughw:0,0 (channel 0)
Channel 0: 1200 baud, AFSK 1200 & 2200 Hz, E+, 44100 sample rate.
Ready to accept AGW client application 0 on port 8000 …
Use -p command line option to enable KISS pseudo terminal.
Ready to accept KISS client application on port 8001 …
Connected to KISS client application …
[0L] PD2LT-2>NODES:<0xfe>
[0L] PD2LT-9>NODES:<0xff>LAPNOS
[0L] PD2LT-9>NODES:<0xfe>LAPNOS
PD2LT-2 audio level = 14(3/3) [NONE] |||||||__
[0.3] PD2LT-2>NODES:<0xfe>
PD2LT-9 audio level = 14(3/3) [NONE] ||||||||_
[0.3] PD2LT-9>NODES:<0xff>LAPNOS