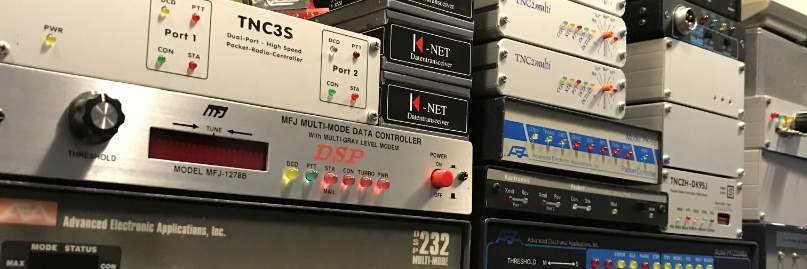
Today I’ve been messing around with an APRS weather beacon. Now Direwolf and Linbpq and Jnos can send an aprs weather beacon. It turns out that this is quite precise, with the format of the beacon.
#!/bin/bash
# The weather beacon have to look like this....
# @220424z5057.81N/00729.37E_094/002g005t043r000p006P006h89b09783
# !5133.52N/00348.15E_073/013g...t048h85b10040wWXD
#
# Jun 01 2003 08:07
# 272/000g006t069r010p030P020h61b10150
# ***********************************************************
# 272 - wind direction - 272 degrees
# 010 - wind speed - 10 mph
# g015 - wind gust - 15 mph
# t069 - temperature - 69 degrees F
# r010 - rain in last hour in hundredths of an inch - 0.1 inches
# p030 - rain in last 24 hours in hundredths of an inch - 0.3 inches
# P020 - rain since midnight in hundredths of an inch - 0.2 inches
# h61 - humidity 61% (00 = 100%)
# b10153 - barometric pressure in tenths of a MILLIBAR - 1015.3 MILLIBARS
My weather station uploads its data to wunderground.com. Now wunderground has the option to read this again with an api key.
After a lot of messing around with a bash script, I am able to create the correct format.
TEMP=-4.9°C Temperature degrees Celsius
WPK=29.4km/h Wind speed in Kilometers per hour
WGK=39km/h Wind guts in Kilometers per hour
GRD=58° Wind direction in degrees
RAIN=0mm Rain in the last hour in mm
RAIN24=0.42065mm Rain in the last 24 hour in mm
RAIN12=0.214mm Rain in the last 12 hour in mm
HUM=74% Humidity in procent
Bar=1004mb Barometric pressure in millibars
FAH=023F Temperature degrees Fahrenheit
WPM=018mph Wind speed in miles per hour
WGM=024mph Wind guts in miles per hour
RNI=000inch Rain in the last hour in inches
RNI=001inch Rain in the last 24 hour in inches
RNI=000inch Rain in the last 12 hour in inches
The file I need to broadcast an APRS Weahter Beacon looks like this.
pd9q@pancake:~/linbpq/wx-project $ cat ~/linbpq/current.txt
Feb 09 2021 13:00
086/004g008t028r000p000P000h75b10007
The config file for Linbpq looks like this, this is in the aprs section of bpq32.cfg
WXCall=PD9Q-7
WXFileName=/home/pd9q/linbpq/current.txt
WXComment=/Weather Station JO11VN
WXPortList=1,5,IS ; comma separated list
WXInterval=10 ; mins
For Jnos in the autoexec.nos in the aprs section
aprs wx call PD9Q-7
aprs wx stat "Weather Station JO11VN"
aprs wx pos "5133.52N/00348.15E_METEO
aprs wx data "/home/pd9q/jnos/wx/current.wx"
aprs bc rftimer 10
Today is the Official release of Direwolf 1.6 (29 Oct 2020)
I’ve been running the “Dev” version of Direwolf for a while. 1.6D. But now I read this morning that John WB2OSZ has made version 1.6 official after 2 years. Version 1.5 was released on 8 Oct 2018
I read in the mail that there is almost no difference with the “Dev” branch. So I don’t really see any need to install the official release.
New Build Procedure:
--------------------
* Rather than trying to keep a bunch of different platform specific Makefiles in sync, "cmake" is now used for greater portability and easier maintenance.
* README.md has a quick summary of the process. More details in the *User Guide*.
New Features:
-------------
* "-X" option enables FX.25 transmission. FX.25 reception is always enabled so you don't need to do anything special. "What is FX.25?" you might ask. It is forward error correction (FEC) added in a way that is completely compatible with an ordinary AX.25 frame. See new document *AX25_plus_FEC_equals_FX25.pdf* for details.
* Receive AIS location data from ships. Enable by using "-B AIS" command line option or "MODEM AIS" in the configuration file. AIS NMEA sentences are encapsulated in APRS user-defined data with a "{DA" prefix. This uses 9600 bps so you need to use wide band audio, not what comes out of the speaker. There is also a "-A" option to generate APRS Object Reports.
* Receive Emergency Alert System (EAS) Specific Area Message Encoding (SAME). Enable by using "-B EAS" command line option or "MODEM EAS" in the configuration file. EAS SAME messages are encapsulated in APRS user-defined data with a "{DE" prefix. This uses low speed AFSK so speaker output is fine.
* "-t" option now accepts more values to accommodate inconsistent handling of text color control codes by different terminal emulators. The default, 1, should work with most modern terminal types. If the colors are not right, try "-t 9" to see the result of the different choices and pick the best one. If none of them look right, file a bug report and specify: operating system version (e.g. Raspbian Buster), terminal emulator type and version (e.g. LXTerminal 0.3.2). Include a screen capture.
* "-g" option to force G3RUH mode for lower speeds where a different modem type may be the default.
* 2400 bps compatibility with MFJ-2400. See *2400-4800-PSK-for-APRS-Packet-Radio.pdf* for details
* "atest -h" will display the frame in hexadecimal for closer inspection.
* Add support for Multi-GNSS NMEA sentences.
Install/compile instructions
### Linux - Using git clone (recommended) ###
***Note that this has changed for version 1.6. There are now a couple extra steps.***
First you will need to install some software development packages using different commands depending on your flavor of Linux.
In most cases, the first few will already be there and the package installer will tell you that installation is not necessary.
On Debian / Ubuntu / Raspbian / Raspberry Pi OS:
sudo apt-get install git
sudo apt-get install gcc
sudo apt-get install g++
sudo apt-get install make
sudo apt-get install cmake
sudo apt-get install libasound2-dev
sudo apt-get install libudev-dev
Or on Red Hat / Fedora / CentOS:
sudo yum install git
sudo yum install gcc
sudo yum install gcc-c++
sudo yum install make
sudo yum install alsa-lib-devel
sudo yum install libudev-devel
CentOS 6 & 7 currently have cmake 2.8 but we need 3.1 or later.
First you need to enable the EPEL repository. Add a symlink if you don't already have the older version and want to type cmake rather than cmake3.
sudo yum install epel-release
sudo rpm -e cmake
sudo yum install cmake3
sudo ln -s /usr/bin/cmake3 /usr/bin/cmake
Then on any flavor of Linux:
cd ~
git clone https://www.github.com/wb2osz/direwolf
cd direwolf
git checkout dev
mkdir build && cd build
cmake ..
make -j4
sudo make install
make install-conf
This gives you the latest development version. Leave out the "git checkout dev" to get the most recent stable release.
For more details see the **User Guide** in the [**doc** directory](https://github.com/wb2osz/direwolf/tree/master/doc). Special considerations for the Raspberry Pi are found in **Raspberry-Pi-APRS.pdf**
144.800Mhz @ 1200Baud (Two tests one on 03-23 and one on 03-24 (rx only))
The first test I did was of course not entirely fair, different antennas were used and different transmitters/receivers. Now I made a setup with the same antenna and the same receiver, so with the same audio input. First the setup, as a computer(if I haven’t lost it.some where) I use a Raspberry PI 2B+, as a sound card I use an Fe-Pi Audio Z V2. As a receiver I use a Realistic pro 2006. It is an old receiver but still works 100%. The antenna is a x50 from Diamond. Of course the Tnc3s from Symek, and Direwolf from John WB2OSZ. I use Kissutil from WB2OSZ, this allows me to connect to Direwolf and the Tnc3s as well as save the received Frames. This makes comparing easy/easier.
Now I have made two start files, one for Direwolf and one for the Tnc3s. I start these in different terminals. I do this manually, so there is a slight delay in starting up.
/home/aprs/direwolf.sh
#!/bin/bash
# Start kissutil on Direwolf kiss port 8001
# Let it run for 30 minutes and kill the process
# Start options "timeout -s 9 1800 ./direwolf.sh"
#
# Kissutil for Direwolf save to /home/aprs/rec-direwolf
/usr/local/bin/kissutil-direwolf -o /home/aprs/rec-direwolf
#
/home/aprs/tnc3s.sh
#!/bin/bash
# Start kissutil on the /dev/ttyUSB0 for the Symek Tnc3s
# Let it run for 30 minutes and kill the process
# Start options "timeout -s 9 1800 ./tnc3s.sh"
#
# Kissutil for the Tnc3s save to /home/aprs/rc-tnc3s
/usr/local/bin/kissutil-tnc3s -p /dev/ttyUSB0 -s 38400 -o /home/aprs/rec-tnc3s
#
I start the scripts with the option “timeout” now I can specify the time how long the script runs. Example. “timeout -s 9 1800 ./tnc3s.sh” In this comparison, both scripts run for 30 minutes. 1800 Second. Now it is time for the comparison.
With the command “ls -A | wc -l” the number of files in the directory are counted. (Frames received.)
03-23-2020
03-24-2020
Here you can see the difference between the received frames of the Tnc3s and Direwolf. There is a difference of 73 and 125 missed frames from the Tnc3s. I tried something with the reception levels of the Tnc3s. It is To soft – Ok – To hard, there is little difference between To soft and Ok and To hard.
I did some tests with the amount of calls received. Just for fun.
Today I made a comparison between Direwolf and a KPC9612. Now I have to say that it is difficult to compare. As the first set I use a KPC9612 and a Yaesu 7900 with an x30 as antenna and as software PinPoint Aprs Client for Windows. As the second set I use a Realistic pro 2006 scanner with an x50 as antenna and Direwolf. These antennas are at the same height.
Now I am very impressed with Direwolf, it seems that my KPC9612 is completely deaf. I clearly hear the packet signal but there is no decode. Unfortunately I don’t have two the same sets and two the same antennas to make the comparison better. But it is very clear here that Direwolf wins big.
Below you can see the difference between the setups. The Communication monitor is from PinPoint Aprs Client, the rest is from direwolf and some aprs parsing.
Okay, I know the comparison isn’t entirely fair. But for me Direwolf is the big winner.
I did some testing with a friend of mine PD2NLX. We have tested the (new) FX.25 protocol (32 and 16 Bytes) This is AX25 with forward error correction. Now the distance between us is quite short, about 5 kilometers. We have discovered that the 16 bytes check at a short distance works better.
First I have installed the “dev” release of Direwolf.
git clone https://github.com/wb2osz/direwolf.git
cd direwolf
git branch -r
git checkout dev
mkdir build && cd build
cmake ..
make -j4
sudo make install
make install-conf
My direwolf.start file look like this
#Start direwolf with -X (16, 32, 64) option to enable FX.25 tx. Number (16, 32, 64) means bytes to check
direwolf -X 16 -d x -t 0 -c /home/pd9q/jnos/direwolf.conf -l /home/pd9q/jnos/logs/direwolf >/dev/tty3
I have add the start option “-d x” Let’s take a look at what that looks like.
FX.25: Matched correlation tag 0x05 with 6 bit errors. Expecting 223 data & 32 check bytes.
FX.25: Matched correlation tag 0x05 with 0 bit errors. Expecting 223 data & 32 check bytes.
FX.25: FEC complete with no errors.
FX.25: FEC complete, fixed 13 errors in byte positions: 11 19 65 73 74 92 116 117
132 138 143 144 192
FX.25: Matched correlation tag 0x06 with 1 bit errors. Expecting 128 data & 32 check bytes.
FX.25: FEC complete with no errors.
FX.25: FEC complete, fixed 1 errors in byte positions: 97
FX.25: Matched correlation tag 0x04 with 0 bit errors. Expecting 32 data & 16 check bytes.
FX.25: FEC complete, fixed 1 errors in byte positions: 248
FX.25: FEC complete with no errors.
FX.25: Matched correlation tag 0x01 with 0 bit errors. Expecting 239 data & 16 check bytes.
FX.25: FEC complete with no errors.
It has, of course, been developed to work over large distances and thus achieve a reasonably reliable connection. But it works surprisingly well.
Probably most of you will already know, Direwolf will support FX.25. This is AX25 with forward error correction. Nice.
The mail John, WB2OSZ posted on the mail list.
What can you do if your radio signal isn’t quite strong enough to get through reliably?
Move to higher ground? Get a better antenna? More power?
Send data very very slowly with narrow bandwidth?
Sometimes those are not options.
Another way to improve communication reliability is to add redundant information
so the message will still get through even if small parts are missing.
FX.25 has been used for more than a decade with some satellites.
Receiving implementations were oriented toward that niche application.
Now that FX.25 is easy to use, integrated into a general purpose TNC,
many other AX.25 based applications can gain the benefits while retaining
complete compatibility with older equipment.
I was reading on a website and there they talked about kissutil from Direwolf. This appears to be a tool you use interactively for troubleshooting a kiss tnc or you can use it as an application interface. Very nice tool.
kissutil can be used interactively for troubleshooting a KISS TNC.
It is usable with direwolf and other generic KISS TNCs connected to a serial port.
It can also be used as an application interface where each side places files in a directory for the other to process.
Options
-h host
Hostname or IP address for a TCP KISS TNC. Default is localhost.
-p port
A number may be specified for a TCP port other than the default 8001.
If not a number, it is considered to be a serial port name such as /dev/ttyS0 or COM3.
-s speed
Speed for serial port. e.g. 9600.
-o rec-directory
For each received frame, a new file is created here.
It is expected that some other application will process files in this directory then delete them.
-T format
Each received frame will be preceded by a timestamp in the specified format.
See strftime documentation for a description of the format string. Example: %H:%M:%S for current time in hours, minutes, seconds.
-f xmit-directory
Files in this directory are transmited and deleted. Another application places a file here when it wants something to be transmitted.
-v
Verbose - Display the KISS frames going to and from the TNC.
It can be easy to link an ax25 interface to Direwolf. This makes it possible to use RMSGateway, Uronode etc with Direwolf. In this script Direwolf is started with the -p option. With the -p option a virtual tnc is created. /tmp/kisstnc.
With mkiss a kiss connection is made on the /tmp/kisstnc. With kissattach the PTY is connected to the ax25 interface.
Jeff KP3FT has written a nice document about the installation of Direwolf and Linbpq on a Raspberry with raspbian Stretch. Download the complet document here.
Dire Wolf
Installing Direwolf and linBPQ on a new Raspian Stretch installation. It’s a combination from various websites and documentation, condensed down into a straightforward walkthrough. This doesn’t include configuration of most BPQ settings, only enough to get it to use Direwolf as a modem.
Older Raspian versions like Jessie may require Pulse Audio removed first, prior to installing Direwolf. Raspian Stretch by default does not have Pulse Audio installed. My Raspian config settings have SSH and VNC enabled.
First:
sudo apt-get update
sudo apt-get upgrade
sudo reboot now
After it restarts, install libasound:
sudo apt-get install libasound2-dev
Optionally install the following if you want to enable Direwolf to use the GPIO pin on certain USB sound devices for PTT:
sudo apt-get install libudev-dev
Then install Direwolf (as of this writing, version 1.5 is the latest):
cd ~
git clone https://www.github.com/wb2osz/direwolf
cd ~/direwolf
git tag
git checkout 1.5
make -j
sudo make install
make install-rpi
make install-conf
Plug your USB sound device(s) into the RPi, open a terminal, and run the following to verify the system sees the USB sound device(s).
aplay -l (the smallcase letter "l", not the number "1")
If the Raspberry pi’s onboard audio is enabled, it will show up as Card 0, Device 0. The USB sound device should show up as Card 1, Device 0. A second USB sound device will show up as Card 2, Device 0, and so on.
Open the direwolf.conf file in a text-editor, scroll down, and enable the correct USB sound device by removing the # at the beginning of the appropriate line. For example, on mine it is:
ADEVICE plughw:1,0
Scroll down and change “N0CALL” to your callsign in the line:
MYCALL N0CALL
Enable the modem speed you want. In my case, I enable 300-baud:
MODEM 300
Scroll down and enable the appropriate PTT option for your setup. Further down, enable and change the AGWPORT and KISSPORT settings for your setup. Optionally disable all the APRS-related lines if you don’t want to use those functions.
Save the file and run Direwolf by double-clicking the desktop icon, or test-run it from Terminal with:
cd ~
direwolf
You should see packet activity if the radio is tuned on the right frequency and audio level is good.
Close Direwolf for now (CTRL-C) and install pilinBPQ (skip down to the Direwolf port section if pilinBPQ is already installed):
sudo su
setcap "CAP_NET_ADMIN=ep CAP_NET_RAW=ep CAP_NET_BIND_SERVICE=ep" linbpq
su pi
sudo mkdir HTML
cd HTML
sudo wget http://www.cantab.net/users/john.wiseman/Downloads/Beta/HTMLPages.zip
sudo unzip HTMLPages.zip
cd ~/linbpq
sudo mkdir BPQAPRS
cd BPQAPRS
sudo wget http://www.cantab.net/users/john.wiseman/Documents/Samples/APRSHTML.zip
sudo unzip APRSHTML.zip
cd ~
sudo chown -R pi:pi linbpq
Copy an existing Linux bpq32.cfg from another source to /pi/linbpq. I have an old bpq32.cfg file here which would need some substantial editing for your own setup:
Be sure to rename it to bpq32.cfg .If you don’t use the above bpq32.cfg file, and add one or both of these Direwolf ports in the ports section of whatever copy of bpq32.cfg you have, depending on how many Direwolf modems you want to run. Change the port numbers to whatever works with your particular setup. The timing settings can also be changed; these are what worked with my setup for 300-baud HF packet and 1200-baud VHF packet.
;******PORT 1 Direwolf 300-baud*****
PORT
PORTNUM=1 ; Port number
ID=HF Packet 300-baud ; PORTS command text
TYPE=ASYNC ; RS232 connection
IPADDR=127.0.0.1 ; DIREWOLF
TCPPORT=8001 ; DIREWOLF
SPEED=19200
CHANNEL=A ; TNC channel
MAXFRAME=1 ; Max outstanding frames
FRACK=5000 ; Level 2 timeout (ms)
RESPTIME=40 ; Level 2 delayed ACK (ms)
RETRIES=10 ; Level 2 max retries
PACLEN=40 ; Max packet length (bytes)
TXDELAY=100 ; Transmit keyup delay (ms)
SLOTTIME=100 ; CMSA interval timer (ms)
TXTAIL=30
PERSIST=63 ; Persistence (256/(# transmissions-1)
DIGIFLAG=1 ; Allow Digipeat on this port
ENDPORT
;****** PORT 2 Direwolf 1200-baud *****
PORT
PORTNUM=2 ; Port number
ID=VHF Packet 1200-baud ; PORTS command text
TYPE=ASYNC ; RS232 connection
IPADDR=127.0.0.1 ; DIREWOLF
TCPPORT=8003 ; DIREWOLF
SPEED=19200
CHANNEL=A ; TNC channel
MAXFRAME=1 ; Max outstanding frames
FRACK=5000 ; Level 2 timeout (ms)
RESPTIME=40 ; Level 2 delayed ACK (ms)
RETRIES=10 ; Level 2 max retries
PACLEN=236 ; Max packet length (bytes)
TXDELAY=100 ; Transmit keyup delay (ms)
SLOTTIME=100 ; CMSA interval timer (ms)
TXTAIL=30
PERSIST=63 ; Persistence (256/(# transmissions-1)
DIGIFLAG=1 ; Allow Digipeat on this port
ENDPORT
Save the file.
Start Direwolf.
Open another Terminal and start linBPQ:
cd ~/linbpq
sudo -u pi ./linbpq
It should connect to Direwolf(s) on port 127.0.0.1:8001 or whatever port(s) you set up.
Notes: —— Multiple instances of Direwolf can run at the same time. Each instance has its own “.conf” file. Each conf file needs to be edited to enable whatever port and USB sound device will be used. To do that, just edit the original “direwolf.conf” file and save it under a new name, such as “direwolf_HF.conf”, etc. Start each instance in Terminal using the “-c” switch to point Direwolf to the correct “.conf” file. In my setup, I start the first Direwolf instance in Terminal with “direwolf -c direwolf.conf”. The second instance is started in another Terminal with “direwolf -c direwolf_HF.conf”.
Direwolf has several options that can be used in the command line. Three that I find particularly useful are the “-q”, -T”, and “-x” options. By default, Direwolf shows audio in/out levels in its Terminal screen. This can be turned off with “-q h”. For example, when I run my HF 300-baud instance of Direwolf to disable audio reports, I run “direwolf -c direwolf_HF.conf -q h”
To show timestamps of sent and received packet frames, use the “-T” option with “%H:%M:%S”. Example: “direwolf -c direwolf_HF.conf -q h -T %H:%M:%S” to disable audio reporting and show timestamds in hours-minutes-seconds format.
The “-x” option immediately starts Direwolf transmitting calibration tones, which I use mostly to key the transciever for tuning the antenna when I switch bands. Example: “direwolf -c direwolf_HF.conf -q h -T %H:%M:%S -x”. Enter CNTRL-C to stop the transmit.
This website uses cookies to improve your experience. We'll assume you're ok with this, but you can opt-out if you wish.AcceptRead More
Privacy & Cookies Policy
Privacy Overview
This website uses cookies to improve your experience while you navigate through the website. Out of these, the cookies that are categorized as necessary are stored on your browser as they are essential for the working of basic functionalities of the website. We also use third-party cookies that help us analyze and understand how you use this website. These cookies will be stored in your browser only with your consent. You also have the option to opt-out of these cookies. But opting out of some of these cookies may affect your browsing experience.
Necessary cookies are absolutely essential for the website to function properly. This category only includes cookies that ensures basic functionalities and security features of the website. These cookies do not store any personal information.
Any cookies that may not be particularly necessary for the website to function and is used specifically to collect user personal data via analytics, ads, other embedded contents are termed as non-necessary cookies. It is mandatory to procure user consent prior to running these cookies on your website.